


How Forex Trading Platforms Simplify Market Analysis and Improve Trade Execution
In the complex and fast-moving world of foreign exchange trading, having the right tools is essential to success. Forex trading platforms serve as vital gateways that not only provide access to the global currency markets but also simplify the process of market analysis and improve the execution of trades. forex trading platforms platforms offer a […]

Affordable Online TRT Clinic Providing Cost-Effective Hormone Replacement Options
An affordable online TRT clinic is a telemedicine-based healthcare service that offers testosterone replacement therapy (TRT) through digital consultations, lab testing, and prescription management. cheapest online trt clinic are designed to make hormone therapy more accessible, cost-effective, and convenient by minimizing the need for in-person visits. The goal is to help men experiencing low testosterone […]
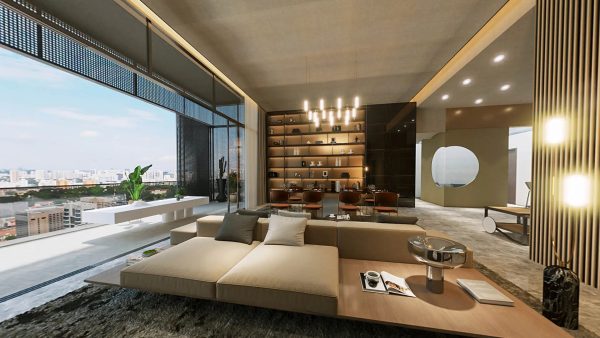
Smart Living in Singapore: How Technology Elevates Luxury Condominiums
As urban living in Singapore becomes more dynamic and fast-paced, residents are seeking homes that are not only stylish and comfortable but also technologically advanced. The rise of smart home technology has transformed the luxury real estate landscape, providing convenience, security, and efficiency that elevate everyday living. Newport Residences exemplifies this trend, offering an urban […]
Medicare Advantage Plans 2026 Tailored for Diverse Healthcare Needs
Medicare Advantage Plans in 2026 are evolving to meet the growing diversity of healthcare needs among members. Medicare Advantage plans 2026 now focus on flexibility, inclusivity, and personalization to ensure that everyone—from active seniors to individuals managing chronic conditions—receives the right type of care. Unlike traditional Medicare, these plans bring together hospital, medical, and additional […]

Narra Residences Unveiling Unparalleled Connectivity in Dairy Farm Walk
Experience Seamless Living at Narra Residences Welcome to Narra Residences, where modern living meets unmatched connectivity. Nestled within the vibrant community of Dairy Farm Walk, this prestigious new development by Santarli Realty and Apex Asia Development offers more than just a home; it represents a gateway to a lifestyle of convenience and luxury. Designed with […]
The Continuum: Redefining Modern Coastal Luxury Living
Where Luxury Meets Lifestyle Imagine stepping into a space that seamlessly blends modern sophistication with timeless elegance. The Continuum is not just another residential development—it’s a statement in design, lifestyle, and coastal living. Nestled in a prime coastal enclave, this project offers residents a rare combination of convenience, serenity, and high-end amenities. It’s the kind […]

Why is roulette gambling here to stay in blockchain casinos?
Roulette gambling keeps its timeless charm in blockchain casinos by merging classic mechanics with modern cryptocurrency innovation. The legendary wheel and betting table adapt flawlessly to digital platforms, gaining transparency and fairness through blockchain integration. This blend respects roulette’s heritage while embracing new technology. Especially, blockchain has boosted games where traditional casino features meet cryptogames […]

Spark Appliance Repair Ensures Fast, Affordable Fixes for Everyday Appliances
In today’s fast-paced world, appliances play a vital role in our daily lives. From refrigerators and washing machines to ovens and dishwashers, these machines make life convenient and efficient. When an appliance breaks down, it can disrupt routines and create unnecessary stress. That’s why timely repair is essential. Spark Appliance Repair understands this need and […]
Medicare Advantage Plans 2026 Helping You Stay on Track With Health Goals
Medicare Advantage Plans 2026 are private insurance plans approved by Medicare that offer an alternative to Original Medicare. Medicare Advantage Plans 2026 combine hospital and medical coverage with extra benefits such as prescription drugs, vision, dental, and hearing services. They are designed to give members a more comprehensive approach to healthcare while providing flexibility and […]
Living in Light: Stunning Views and Ambiance at Pinery Residences
A home isn’t just where you stay — it’s where your senses come alive.At Pinery Residences, natural light, panoramic views, and thoughtful ambiance transform everyday living into a visual and emotional experience. This is luxury that doesn’t shout — it radiates. Panoramic Views That Inspire Wake up to city skylines, lush greenery, or tranquil horizons. […]